

The transition into Spring 2027 marks a definitive shift in nail aesthetics, moving away from flat, highly saturated pastels toward complex, multi-dimensional finishes that require specialized formulations. For salons, independent technicians, and high-volume users, blindly purchasing seasonal trend colors often results in dead inventory, expired formulas, and poor return on investment. Capitalizing on Spring 2027 trends requires evaluating products not just on color accuracy, but on formulation stability, layering versatility, and curing reliability. You need products that perform consistently across different nail types and application techniques. Every bottle must justify its place on your shelf through high usage rates and reliable curing performance. This guide breaks down the essential finishes and shades—including Pantone's Color of the Year influences—to prioritize for a profitable and high-performing seasonal inventory.
Finish Over Pigment: Spring 2027 prioritizes dimensional textures, making sheer, translucent, and pearlescent formulas more critical investments than traditional opaque creams.
Inventory Efficiency: High-quality sheer and jelly formulas allow technicians to create custom gradients and aura designs without purchasing dozens of standalone shades.
Formulation Risks: Translucent and glass-finish gels require strict evaluation of self-leveling properties and photo-initiator balance to prevent pooling and under-curing.
Color Palette Anchors: Muted earth tones (mocha mousse, matcha, pistachio, sage) and soft aquatic hues (turquoise, pastel blues) will dominate client requests, replacing highly saturated neons and emeralds.
Defining what makes a seasonal collection a worthwhile investment requires looking beyond the color wheel. You must focus on client retention, cost-per-service, and formula longevity. A trendy shade that chips after four days damages your reputation. A formula that thickens in the bottle after two months destroys your profit margins. Success criteria for Spring 2027 rely on versatility. You need products that perform consistently across different nail types and application techniques. Every bottle must justify its place on your shelf through high usage rates and reliable curing performance.
When auditing a new seasonal release, apply these specific success criteria to avoid dead stock:
Check the undertone compatibility with your existing top-selling nudes and builder gels.
Verify the opacity levels across the collection to ensure they meet the demand for sheer finishes.
Assess the self-leveling speed to confirm the formula will not slow down your application time.
Test the flexibility of the cured product to ensure it moves with the natural nail plate without cracking.
Market data drives a clear shift away from standard opaque pastels. Clients increasingly request layered, breathable-looking finishes. Heavy, thick applications look dated. Modern aesthetics favor a lightweight appearance where the natural nail bed slightly peeks through. This dimensional approach mimics the look of natural health. It also hides regrowth lines much better than stark, opaque colors. As the nail grows out, the sheer cuticle area blends smoothly into the natural nail. This extends the wearable life of the manicure and increases overall client satisfaction.
This shift forces technicians to rethink their application methods. You can no longer rely on floating a thick layer of opaque color to hide imperfections in your base structure. Dimensional finishes require a flawless foundation. Your dry manicure prep and base gel application must be perfectly smooth, as sheer colors will highlight any ridges or bumps on the nail plate.
You must assess a brand's seasonal release for cohesive undertones. Look at the entire collection as a working system. Can you mix the shades together? Do they share a complementary temperature? Evaluating Spring Gel Polish Color Collections requires testing their cross-seasonal viability. A great spring shade should easily transition into Summer 2027. You want colors that serve as strong bases for summer nail art. Avoid collections filled with standalone novelty colors. Prioritize collections that offer mix-and-match potential to maximize your inventory efficiency.
A cohesive collection allows you to create gradient designs and ombre effects without fighting clashing undertones. For example, a spring collection featuring a muted sage green, a soft pistachio, and a sheer matcha allows you to execute a perfect monochromatic gradient across five fingers. If the collection jumps randomly from a warm olive to a cool mint, blending them becomes visually jarring.
Never base purchasing decisions solely on promotional imagery. Studio lighting and post-production editing often alter the true undertone of a gel. You must source independent swatch and review data before bulk purchasing. Promotional photos rarely show how a formula self-levels. They do not reveal if a pastel shade streaks during application. Look for raw, unedited video footage of the product being applied. Verify that the promotional imagery matches real-world curing and color payoff. Test the colors in natural daylight, not just under an LED ring light.
When testing swatches yourself, apply the product to clear swatch sticks rather than opaque white ones. Clear sticks reveal the true translucency and pigment suspension of the formula. Hold the cured swatch stick over different skin tones to see how the color adapts. This practical testing method prevents you from buying a shade that looks beautiful in the bottle but washes out your clients' hands.
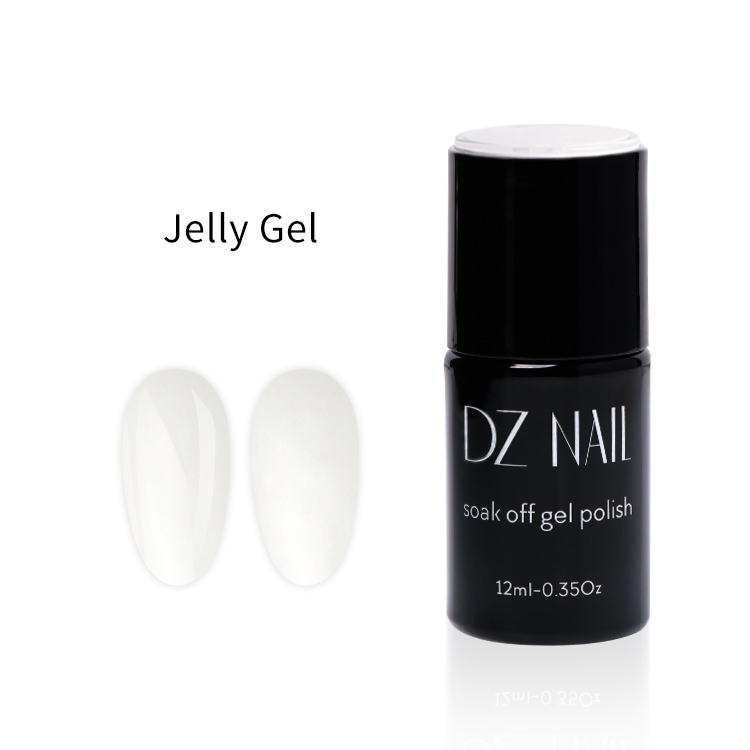
Warm, muted neutrals dominate the sheer category. Mocha mousse stands out as the primary Pantone influence for the season. Soft peach, caramel, and unexpected pastel grays round out the essential palette. These shades flatter a wide variety of skin tones. They provide a sophisticated, understated elegance that clients request daily.
The application value of these formulas cannot be overstated. They are absolutely essential for negative space designs. You need them for popular "blush" nails and natural-looking overlays. A high-quality Sheer Jelly Gel Polish acts as a perfecting tint for the natural nail. It smooths out imperfections while maintaining a translucent, syrupy finish.
To execute a flawless blush nail using jelly formulas, follow a strict layering process. Apply a sheer nude base and cure. Place a small drop of pink jelly in the center of the nail bed. Use a fine liner brush to tap and diffuse the edges outward, then cure. Apply a second sheer nude layer over the top to encapsulate the pink center. This technique requires a jelly formula that stays exactly where you place it without running into the sidewalls.
When evaluating these products, you must assess pigment suspension. High-quality jelly gels must maintain sheer color without streaking. Poor formulas separate in the bottle and apply unevenly. You should not need excessive coats to achieve an even tint. Applying too many layers adds unwanted bulk to the nail architecture. This leads to a thick, unnatural appearance and increases the risk of lifting at the cuticle.
The color focus for glass finishes shifts toward muted greens and bright aquatic accents. Pistachio, sage, matcha, and muted mint replace the harsh neons of previous years. Turquoise and sheer blue provide vibrant yet sophisticated options for late spring. These colors offer a refreshing, botanical feel that aligns perfectly with seasonal transitions.
These formulas provide immense application value. They are ideal for 3D colorful designs and encapsulation techniques. You can layer dried flowers, mylar flakes, or gold leaf between coats. This creates stunning stained-glass or mermaid-inspired looks. A premium Translucent Glass Glaze Gel allows you to charge premium prices for specialized nail art services.
The stained-glass technique relies heavily on the stability of the glass gel. Paint a black or metallic outline of your design and cure it. Float different glass colors into the negative spaces. The glass gel must have enough surface tension to stay within the outlines without bleeding into neighboring colors before you can get the hand into the lamp.
Evaluation dimensions must focus on clarity and yellowing resistance. Glass gels must remain crystal clear after curing. You must evaluate their UV stability. Poorly formulated glass gels will discolor or turn yellow after prolonged sun exposure. This completely ruins the stained-glass effect. Always test clarity by curing a bead of clear or tinted glass gel on a form and exposing it to natural sunlight for several days.
Pearlescent finishes are moving away from stark whites and silvers. The focus is now on lavender, soft pink, peach, and cool-toned milky whites. These shades offer a delicate, ethereal glow. They capture the light beautifully without looking metallic or heavy. The pearlescent shift adds instant depth to any basic manicure.
This category replaces the need for messy chrome powders. It embeds the iridescent shift directly into the polish. This saves application time and eliminates the frustration of chipping chrome edges. It is perfect for creating the dreamy, diffused gradients required for modern aura nail trends. A reliable Soft Pearlescent Gel Polish streamlines your workflow significantly.
Creating an aura nail without an airbrush machine is highly efficient with pearlescent formulas. Apply your base color and cure. Apply a thin layer of clear blooming gel, but do not cure it. Place a dot of pearlescent gel in the center of the nail and let it expand outward. Once the gradient reaches the desired diffusion, cure it immediately. The pearlescent particles catch the light, making the aura effect look incredibly dimensional.
You must evaluate the mica particle distribution carefully. The formula must offer a smooth application. Visible brush strokes ruin the pearlescent effect. Gritty textures indicate poor milling of the mica particles. Apply the gel with a floating technique and let it rest for five seconds before curing. This allows the particles to settle and self-level, creating a flawless, uniform glow.
Finish Category | Key Spring 2027 Colors | Best Application Use | Primary Technical Challenge |
|---|---|---|---|
Sheer Jelly | Mocha Mousse, Caramel, Pastel Gray | Blush nails, natural overlays, negative space | Preventing streaks without adding bulk to the apex |
Glass Glaze | Pistachio, Sage, Turquoise | Encapsulation, 3D art, stained-glass effects | Maintaining clarity and preventing UV yellowing |
Soft Pearlescent | Lavender, Soft Pink, Milky White | Aura nails, diffused gradients, chrome alternatives | Eliminating visible brush strokes and gritty mica |
Understanding the balance between color payoff and curing efficiency is mandatory for safe application. Highly pigmented formulas look great on a swatch stick. However, they often struggle to cure completely. The dense pigment blocks the UV/LED light from penetrating to the bottom layer. This leaves uncured wet gel against the nail plate. Uncured gel causes severe lifting, peeling, and increases the risk of contact allergies. When selecting a gel polish, you must ensure the light can penetrate the formula completely.
Test new colors by applying a standard coat to a form, curing it, and then slicing through it with a cuticle pusher. If the bottom is wet or gooey, the pigment density is too high for safe application. You will need to apply that specific color in paper-thin layers, curing each one for a full 60 seconds. If a formula requires four paper-thin layers to look good, it is not efficient for salon use.
Viscosity determines how the product handles on the nail. Sheer and translucent formulas require a medium viscosity. If the gel is too thin, it will flood the cuticles and sidewalls before you can cure it. Flooded cuticles lead to immediate lifting and messy results. If the gel is too thick, it will not level out brush strokes. This leaves a bumpy, uneven surface that requires excessive filing. A medium viscosity allows you to apply the product smoothly. It stays where you put it but relaxes enough to create a glass-like surface.
Pay attention to salon temperature. Cold environments will temporarily thicken your formulas, making them sluggish and prone to bubbling. If your salon is cold in the morning, roll the bottles between your hands or place them in a warm water bath for five minutes before starting your first service. This restores the intended viscosity and ensures smooth self-leveling.
Viscosity Level | Handling Characteristics | Best Used For | Common Pitfalls |
|---|---|---|---|
Low (Thin) | Runs quickly, levels instantly | Detailed line work, tinting clear builder gels | Flooding cuticles, pooling in sidewalls |
Medium | Stays put briefly, levels smoothly | Full color overlays, jelly gradients, aura nails | Bubbling if overworked with the brush |
High (Thick) | Holds shape, resists leveling | 3D texture art, heavy glitter encapsulation | Leaving visible brush strokes, under-curing |
Evaluating the chemical composition of trending formulas is a professional responsibility. HEMA (Hydroxyethyl Methacrylate) is a common monomer used for adhesion. However, it is also a leading cause of contact dermatitis in the nail industry. As clients become more aware of nail product allergies, hypoallergenic options are increasingly requested. You must mitigate the risk of contact dermatitis for sensitive clients.
Review the Safety Data Sheets (SDS) for all new seasonal collections. Look for formulas that balance safe adhesion with lower sensitizing ingredients. Prioritizing HEMA-free or TPO-free options protects both your clients and your own long-term health. When reading an SDS, check Section 3 for the exact percentage of sensitizing monomers. If a brand refuses to provide an SDS, do not purchase their products. Transparency in chemical composition is non-negotiable for professional application.
You do not need to buy every single color released for Spring 2027. Smart inventory management relies on layering techniques. You can use a core set of sheer jelly gels over different opaque bases. This multiplies your available color options without expanding physical inventory. Mastering these layering combinations allows you to offer dozens of custom shades while only stocking a fraction of the bottles.
Implement these specific layering recipes to stretch your inventory:
Apply a sheer peach jelly over a stark white base to create a bright, creamy pastel peach.
Apply that same sheer peach over a natural nude base to create a subtle, warm tint for French manicures.
Layer a sheer turquoise glass gel over a silver magnetic cat-eye base to create a deep, glowing ocean effect.
Apply a soft pearlescent white over a sheer pink jelly to create a custom soft pink aura base.
Do not pack away your winter colors when spring arrives. Implement strategies for cross-seasonal mixing. You can blend Spring 2027 pastels with leftover Winter 2026/2027 espresso browns and rich berries. Layering a sheer spring caramel over a dark winter brown softens the harshness of the dark shade. It creates a beautiful, dimensional transition color that works perfectly for early March appointments.
You can also transition spring colors into Summer 2027 easily. Add silver glitter accents or chrome flakes to spring turquoise bases. This instantly updates the look for the summer season without requiring new base colors. Mixing a drop of bright summer neon into a spring pastel gray creates a muted, sophisticated pop of color that bridges the gap between the two seasons.
Calculating the true cost of premium pearlescent or glass gels is essential for your business. Do not just look at the bottle price. Look at the number of applications per bottle. High-quality sheer gels often require fewer coats to achieve the desired effect. This means one bottle yields more full sets. A highly pigmented jelly that covers in two thin coats will outlast a cheap jelly that requires four coats to stop streaking.
Furthermore, factor in the service margins. Aura nails and stained-glass encapsulation command higher service tickets. A bottle that allows you to execute high-margin nail art efficiently will yield a much better cost-to-use ratio than a difficult-to-work-with formula that slows down your appointment times. Time is your most expensive asset at the desk; products must work with you, not against you.
Translucent gels present a unique curing risk. Because they are sheer, they can look fully cured on the surface while remaining soft underneath. You must follow technical guidelines for matching lamp wattage and nanometer output to specific formulations. Most modern professional gels require a lamp that emits both 365nm and 405nm wavelengths. Ensure your lamp operates at the correct wattage, typically 48W or higher.
Regularly clean the diodes inside your lamp. Dust and cured gel on the bulbs significantly reduce curing power. Diodes degrade over time, usually after about 3000 hours of use. A lamp might turn on and look bright, but the actual UV output drops, leading to under-cured gel. Perform a tap test on your cured layers using an orangewood stick. It should sound sharp and hard, not dull or sticky. Always apply translucent layers thinly and cure for the full 60 seconds recommended by the manufacturer.
Clear communication prevents client dissatisfaction. You must manage expectations regarding sheer finishes. Clients accustomed to opaque coverage may be surprised by visible nail lines (VNL). Before starting the service, explain the realities of jelly and glass finishes. Show them swatches on clear sticks so they understand the translucency.
If a client loves a sheer color but hates seeing their free edge, you have options. Apply a tinted rubber base coat or a blurring concealer base first. This camouflages the natural nail line while still allowing the sheer color to shine on top. You can also use a soft white builder gel to create an opaque extension, then apply the sheer jelly over it for a flawless, uniform look.
Highly reactive sheer and pearlescent gels require careful storage. Poor storage practices lead to premature polymerization and pigment separation. Never leave bottles open near your curing lamp or a sunny window. Even ambient UV light from a window will slowly cure the gel inside the bottle, creating thick, unusable clumps.
After every use, wipe the neck of the bottle with a lint-free wipe and alcohol. If gel cures on the threads, the cap will not seal properly. Air exposure degrades the formula and causes the photo-initiators to break down. Store all bottles upright in a cool, dark place. Shake pearlescent formulas gently before use to redistribute the mica particles evenly, but avoid vigorous shaking, which introduces air bubbles into the gel.
Audit your current inventory for usable base colors that can be layered under new sheer finishes to maximize color options.
Request formulation safety data sheets (SDS) from prospective brands to ensure hypoallergenic compliance and protect sensitive clients.
Test sample bottles of translucent formulas for curing efficiency and self-leveling speed before committing to full seasonal collections.
Update your service menu to highlight dimensional finishes like aura nails and stained-glass encapsulation to drive higher service tickets.
A: Trending shades include muted earth tones like mocha mousse, caramel, pistachio, and sage, alongside soft aquatic hues like turquoise, pastel blues, and pastel grays.
A: Sheer jelly formulas are designed to be translucent. Typically, 2-3 thin coats provide the intended syrup or glass effect without achieving full opaque coverage.
A: Glass glaze gels typically have a higher clarity and a harder, more rigid finish suitable for 3D art, encapsulation, and mermaid-inspired designs, whereas jelly polishes are softer and used primarily for sheer color overlays.
A: Use a floating brush technique with minimal pressure, and allow the gel to self-level for 5-10 seconds before curing to ensure the mica particles settle evenly.
A: Yes, sheer and jelly formulas are highly versatile. You can layer spring caramels or pastel grays over existing winter espresso browns or rich berries to create custom, dimensional transition colors.
A: Wrinkling occurs when the gel is applied too thickly, preventing the UV/LED light from penetrating to the bottom layer. Always apply in thin, even coats.
A: Yes, but the technique has evolved. Instead of airbrushing, technicians are increasingly using soft pearlescent gels and blooming gels in pink, peach, and lavender to create a dreamy, diffused gradient effect.


